I have been getting a lot of people asking about how I made the Shell Ruche trim on my wedding dress. So here we go….
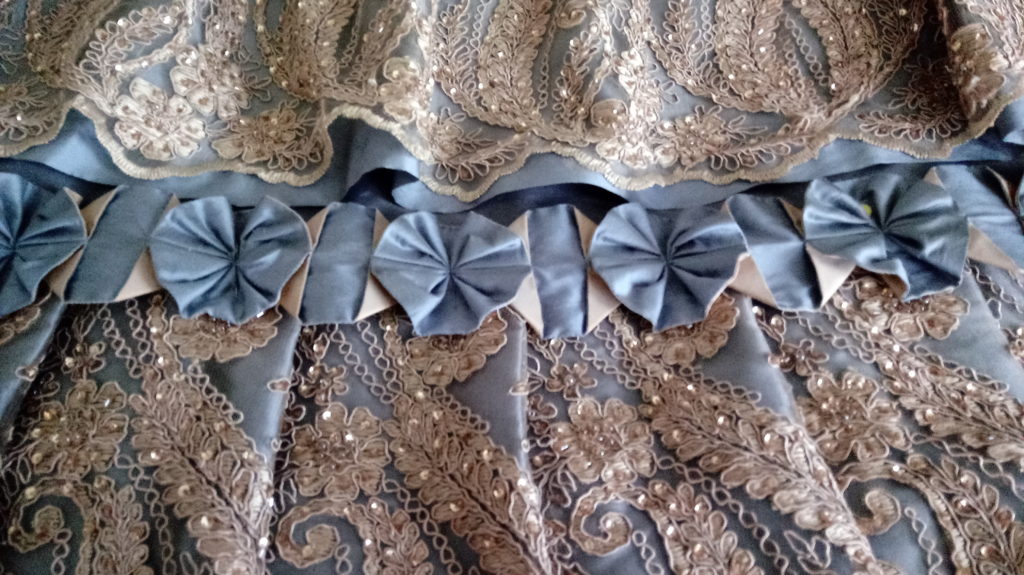
Here is the skirt, with the ruche heading the lace and silk ruffle. My version was made with fabric, but you can use a ribbon to do the same thing.
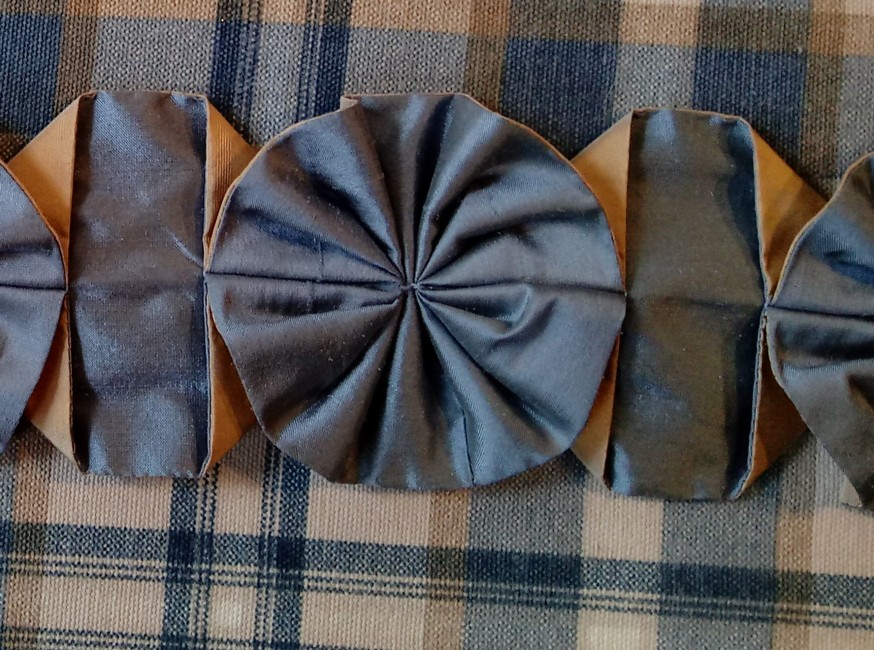
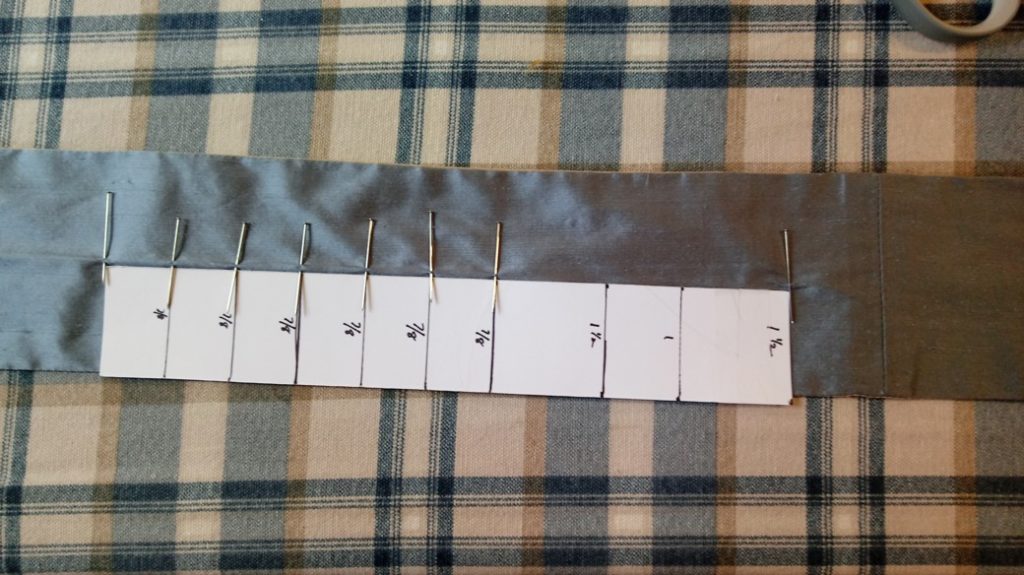
The pic here is the skirt portion with the ruche. This ruche is 3″ wide, and is made from 2 colors of silk dupioni. The gold is the underside and the blue is the top side. The fabrics were sewn right-sides together into a tube, and then turned right side out. I made a smaller version of this ruche for the bodice, at 2″ wide. This essentially creates a “ribbon” to make the ruche from. I made one extrememly long ribbon, as it takes about 10″ of ribbon to make 3″ of ruche.
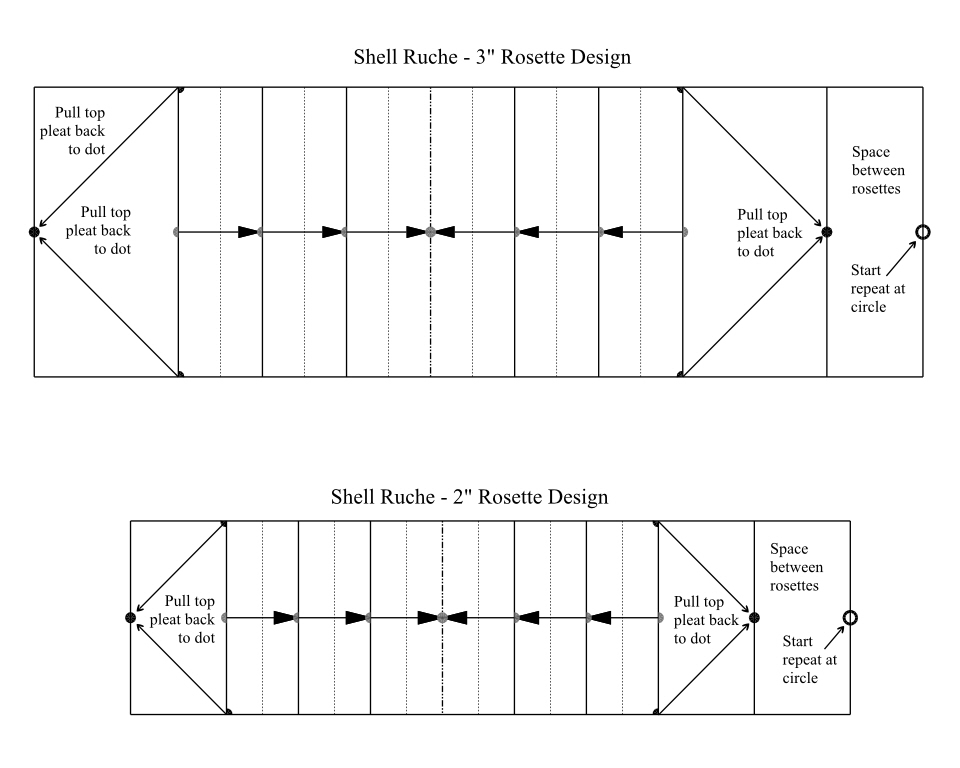
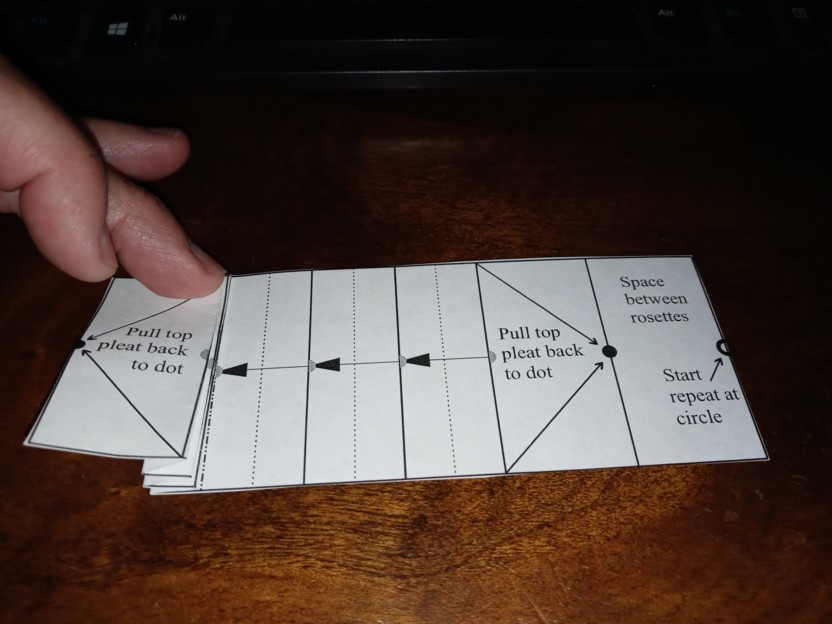
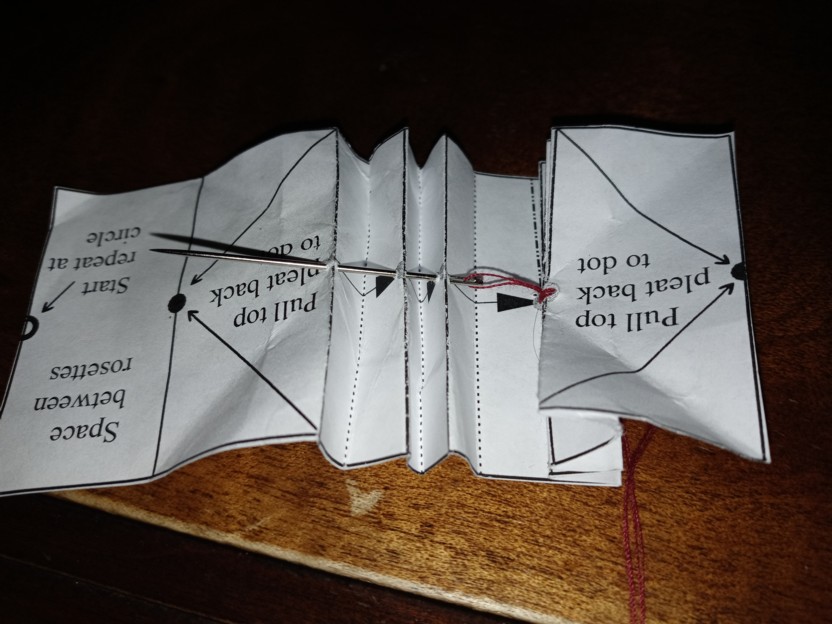
The ruche is made from a triple box pleat tacked down in the middle, and then the top edges are pulled back and tacked down to form the rosette look. There is a 1″ space between the rosettes, but this space can be adjusted to any width, or even omitted, as desired.
I have created a pattern for making the 2 different sizes of rosette: 2″ and 3″ wide. You can download a pattern for the Shell Ruche here.
The patterns are given for one full repeat, with the space included. If you want to make the pattern work for a larger or smaller ribbon, you can print the pattern at different sizes. For example, if you want a 2.5″ width ribbon, you can print the 2″ pattern at 125% size. Or the 3″ ribbon printed at 133% will give you a 4″ width pattern. If you want to go smaller that 2″ width, I would recommend that you redraw the pleats to be only 2 pleats, instead of the 3. Otherwise the pleats become very hard to manage.
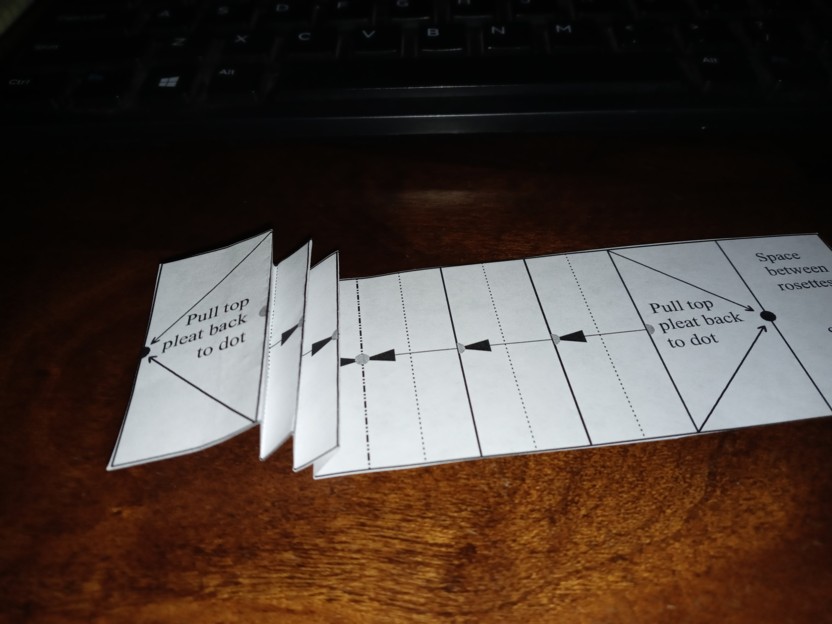
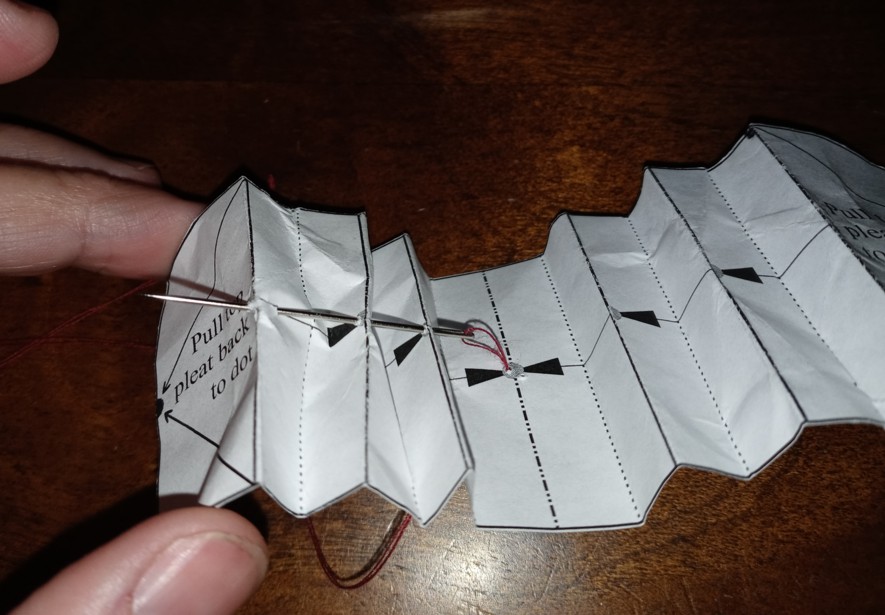
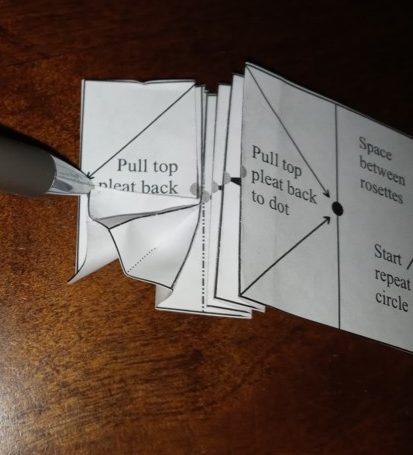
To make each rosette, first fold the pleats as marked on the pattern. Fold the pleats over the top so that the grey dots are all on top of each other. Tack the stack of pleats as you go.
To make each rosette, first fold the pleats as marked on the pattern. Fold the pleats over the top so that the grey dots are all on top of each other. Tack the stack of pleats as you go. I found the best way to make the pleats was to run a needle up through the center point, and then through the dots. Then tighten them up, adjusting as you go, and sew down in one step.
I found the best way to make the pleats was to run a needle up through the center point, and then through the dots. Then tighten them up, adjusting as you go, and sew down in one step.
Working with fabric is a bit more difficult than paper. I used pins to mark the fabric, as I was worried about permanent mark showing. I ended up folding the strip down the middle long ways, to mark the center.
Now you just have to fold back the outside corner of the top pleat. I folded back one at a time, and tacked them down to the ribbon at the dot.
And that’s it. You finished one whole rosette. Now you can move on to the next one. Once I sorted out how to do these, I was creating 1 rosette about every 15 minutes. Not super speedy, but not so slow that it wasn’t worth doing.