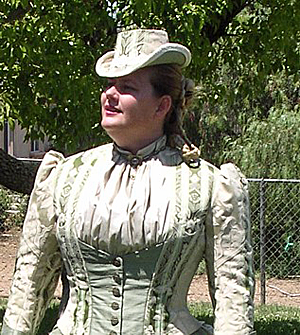
Lately, I have gotten a lot of interest in this particular bodice. So I have decided to start off my Sewing Tips series with details and images of how achieve this fairly easy effect from any basic vest pattern. This bodice specifically was made from the 1884 French Vest Bodice – TV463.
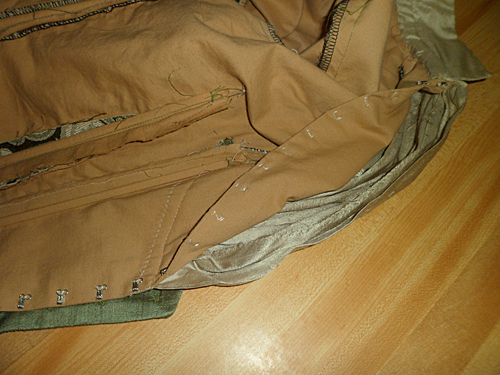
The layered effect is all built onto the vest portion itself, before the vest is sewn to the rest of the bodice. Of course, since this bodice is already completed, the pics will show all the pieces attached to the bodice, instead of separate as you construct it.
First, a quick rundown of how this is put together. There is a fitted lining made from the vest pattern piece under what you see on the outside, and closed with hook/eyes down the center front. The gathered “blouse” portion is added to this lining. And lastly, a vest with working buttons/holes is laid over the lining.
So now you know where we’re going, let’s get to it!
(view from the inside)
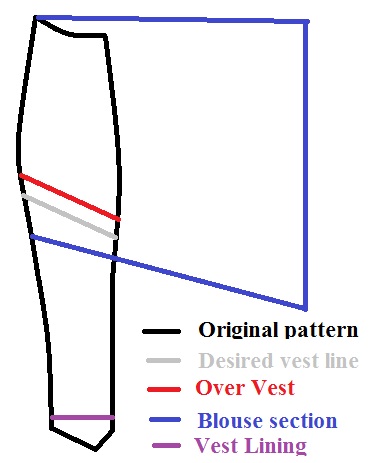
First thing is to figure out the shape of the vest you want to make. After fitting your mockup, mark on the vest exactly where you want the vest to end and the “blouse” to begin. Transfer that line to the vest pattern, and add 1/2″ above that line for the cutting line of your over vest. Add 1 to 1 1/2″ below that line for the cutting edge of the blouse portion.
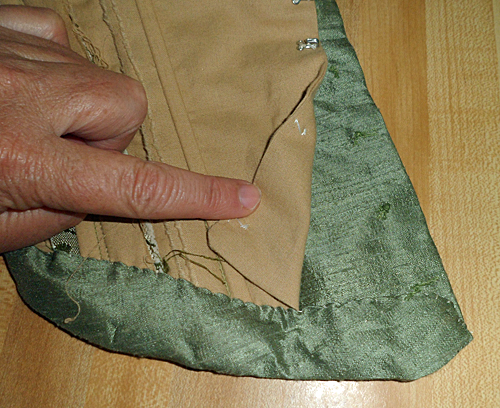
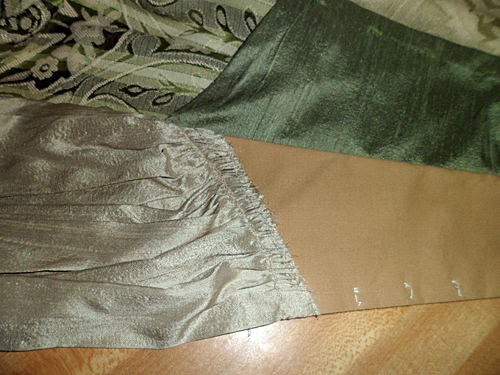
Next step is to create the vest lining. For my bodice, I was using tea-dyed muslin as my flatlining. I cut 4 of the entire vest pattern piece out of the muslin. I also cut the point off of the bottom about 1″ short at the side and straight across. This would help separate the hems, keep the lining from showing, and make it easier to do the finish facings on the main bodice. After they are cut out, sew the vests pieces right-sides-together, along the center front and bottom edge. To make the center front edge just meet (instead of over lap for buttons) sew the center edge with a 1″ seam allowance. Clip, turn right side out, and press. Baste the neck and side edges together just to keep it all organized. Sew the hooks and eyes to center front edges. I spaced the hooks farther apart under the outer vest, knowing that the outer vest would hold that part of the bodice.
(the bottom point, from the inside. Under my finger is a bone casing sewn to the vest seam.)
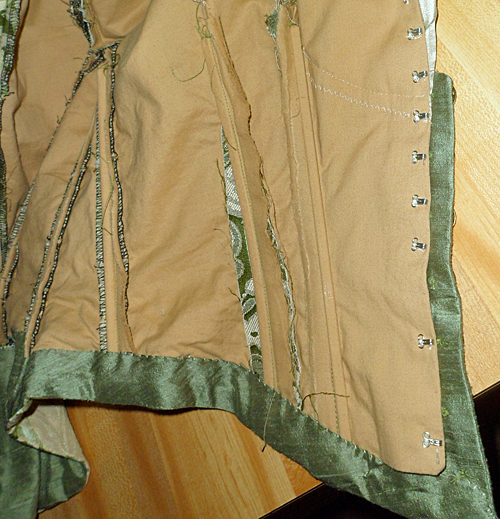
And now on to the “blouse” portion. Take your vest pattern and extend it wider to about 3x the width of the pattern piece. If you can, cut the center front on the selvedge, and cut two. Fold the front edge under 1″ and press. Gather the top edge and the bottom edge to fit the lining. Baste along the gathers. I like to zigzag over the bottom edges to hold the down smooth. Be careful sewing over the hooks and eyes.
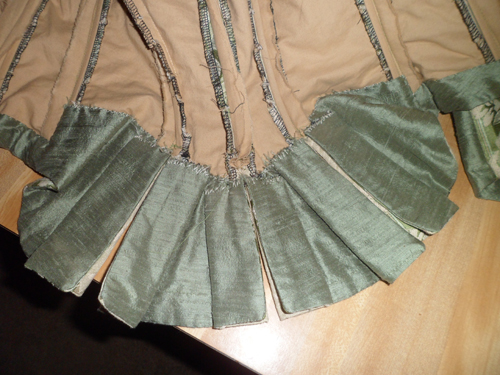
(blouse portion sewn to lining and the over vest folded back.)
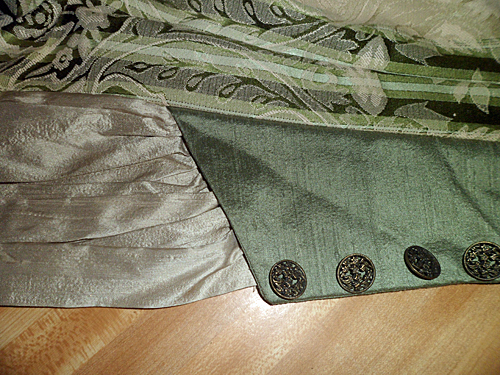
Lastly, the outer vest. Cut 4 of the shortened vest pattern. Sew them right-sides together along the top and center front edges, 1/2″ seam allowances. I left the bottom edge open to be finished later. Turn the right side out, and sew the buttons and button holes along the center front, 1/2″ from the edge. Lay the over vest pieces onto the vest lining pieces matching the side edge. Check to make sure that the vest properly covers the blouse gathers. Baste the layers together along the side edges only.
Now you just have to sew the completed vest to the rest of the bodice. Add the collars as per the instructions. Add boning and everything else, as normal. I did not do a full lining, and instead ran bias facings around the hem and inside the neckline. The back had wide facings the depth of the pleats.
And there you have it, a fabulous layered look! See, easy!!